First Steps #5: Pluto.jl 🎈
Pluto.jl provides a reactive notebook environment specific to Julia.

What's Pluto?
Notebook environments (e.g. Jupyter and Observable) have become extremely popularity in the last decade. They give programmers a way to intersperse code with markup, add interactive UI elements, and show off code in a format more interesting than text files. People love them (well, not everyone).
Pluto.jl is a newcomer (PlutoCon 2021 was just held to celebrate its one-year anniversary!) to the world of notebook environments. It provides a reactive environment specific to Julia. People are doing some very cool things with Pluto. Check out MIT's Introduction to Compuitational Thinking course for some fantastic public lectures with Pluto.
Pluto Quickstart
- Installing Pluto:
] add Pluto- Starting the Pluto Server:
using Pluto
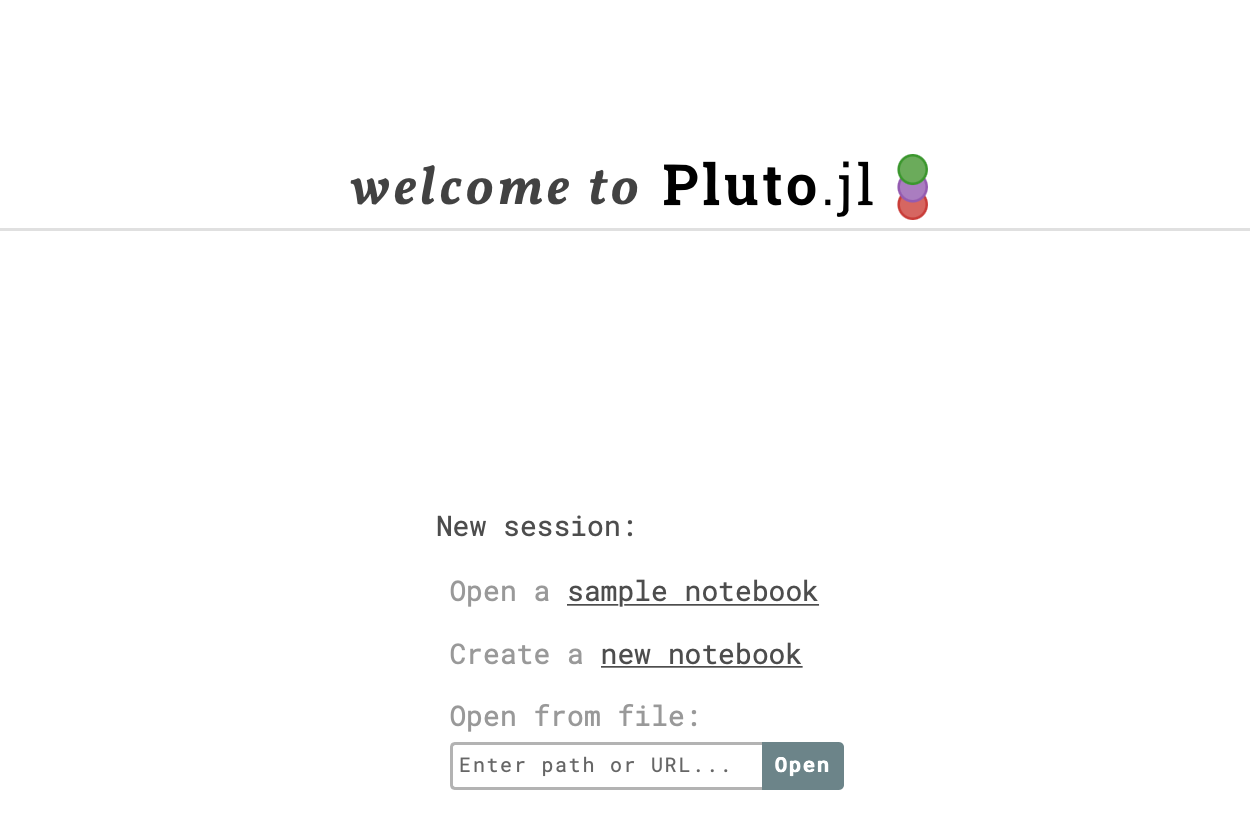
Pluto.run()- The above command will open up the following page.
- To get back to this page from an opened notebook, click the Pluto.jl icon in the top navbar.
- For a deeper introduction to Pluto, go through the sample notebooks (we highly recommend them!).
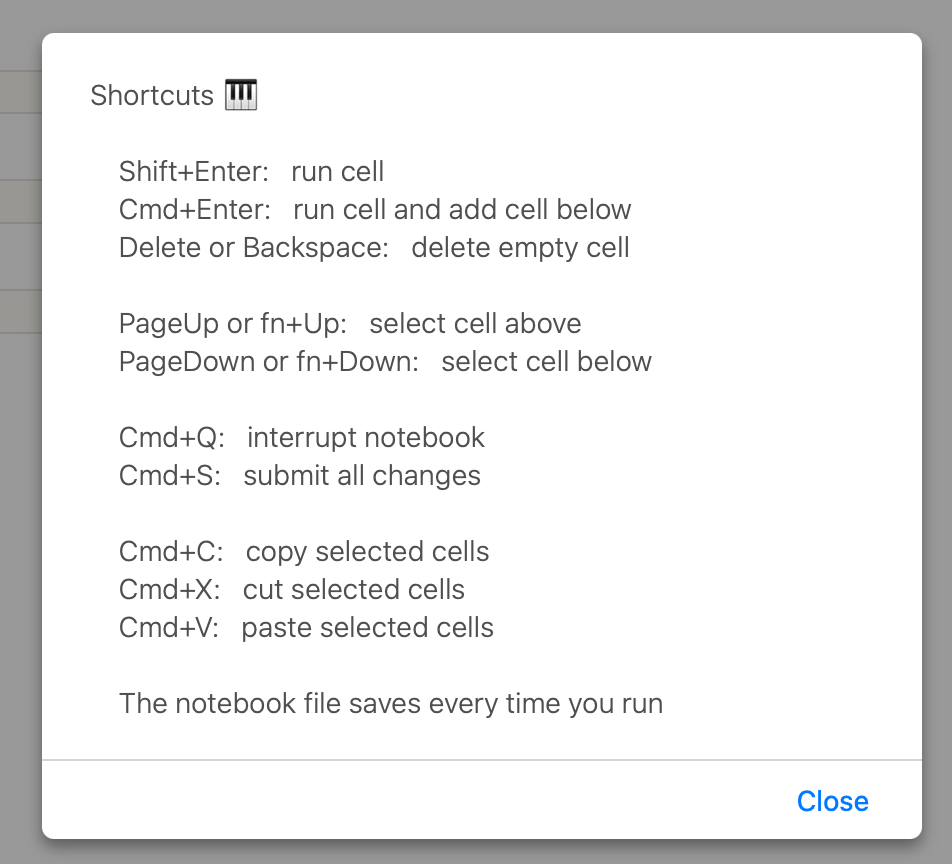
- Press
ctrl + ?to view keyboard shortcuts:
Key Points about Pluto
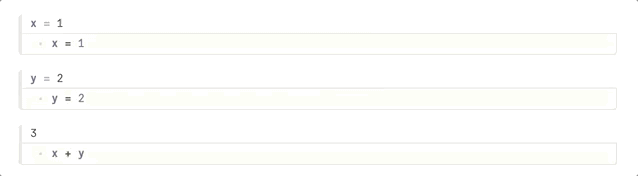
1. Your Code is Reactive.
When you change a variable, that change gets propagated through all cells which reference that variable.
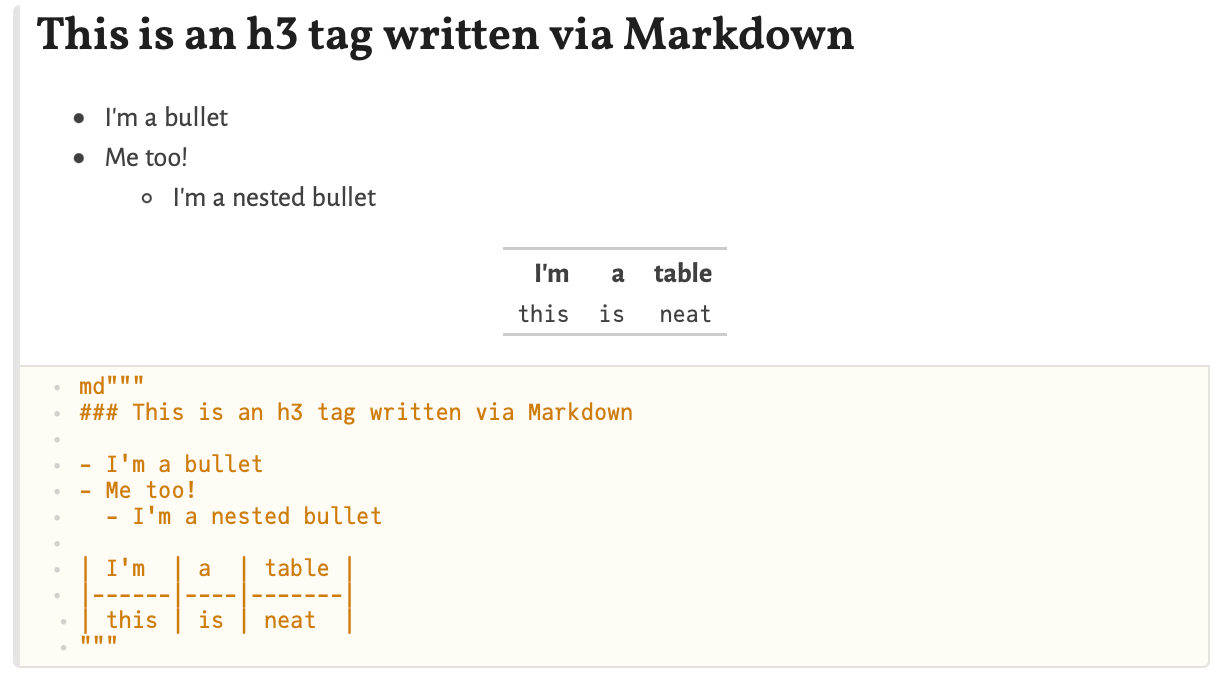
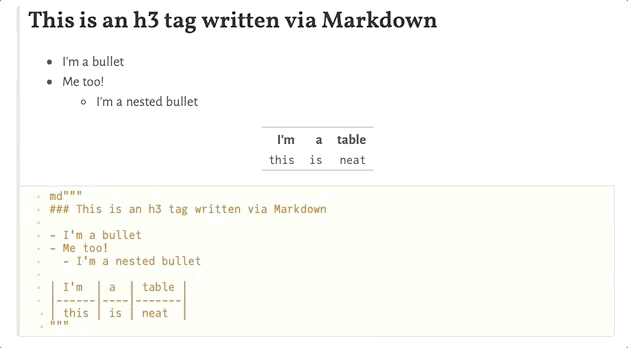
2. Returned Values will Render as HTML.
That means things like the markdown string macro (md) will look nice. Note that output gets displayed above the code.
3. Code can be Hidden.
Click the eye icon on the top left of a cell to hide the code. It only appears if your cursor is hovering over the cell.
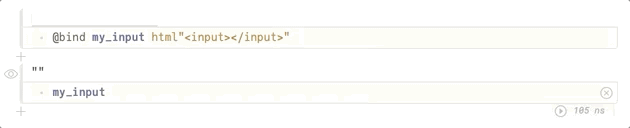
4. You can @bind HTML Inputs to Julia Variables.
Here we are using Pluto.@bind along with the html string macro to create a simple text input and bind it to a Julia variable my_input. The @bind macro works with any HTML input type.
5. You can Avoid Writing HTML by using PlutoUI.
- First:
] add PlutoUI- Then:
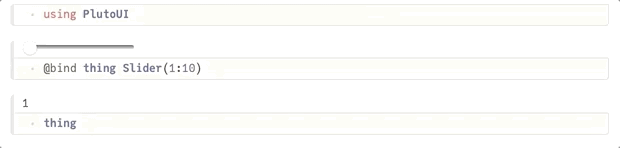
- To see all of the UI options in PlutoUI, open the PlutoUI.jl sample notebook.
Notes, Tips, and Tricks
Multiple Expressions
- Pluto will try to get you to split multiple expressions into multiple cells (You can also put multiple expressions in a
begin-endblock). This helps Pluto manage the dependencies between cells and avoids unnecessary re-running of code that "reacts" to something it doesn't need to.
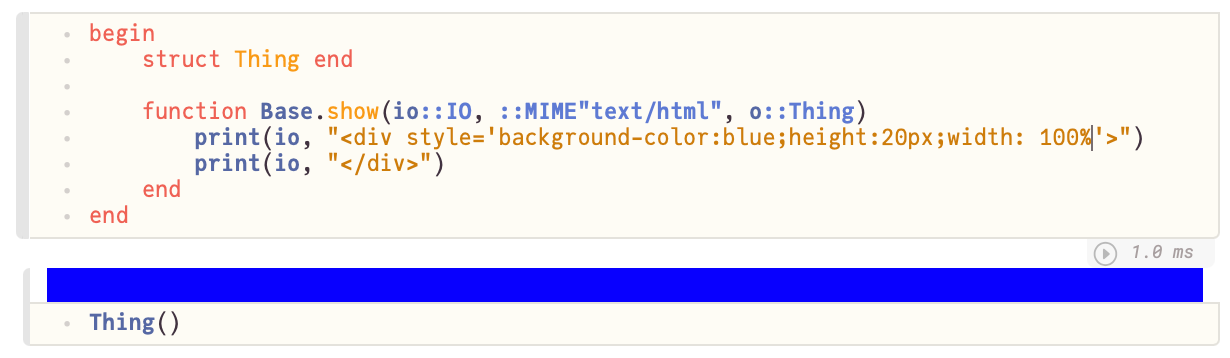
Custom Display Methods
- If you want something to make use of Pluto's rich HTML display, you need to define your own
Base.showmethod for thetext/htmlMIME type.
Interpolating UI Elements into Markdown
You can use Julia's string interpolation syntax to interpolate values into a markdown block that will then get rendered as HTML. This includes html strings and PlutoUI elements! You can even define the UI element somewhere else to keep your markdown block look cleaner.
x_ui = @bind x Slider(1:10)

md"My UI Element: $x_ui"

# Provides the same result:

md"My UI Element: $(@bind x Slider(1:10))"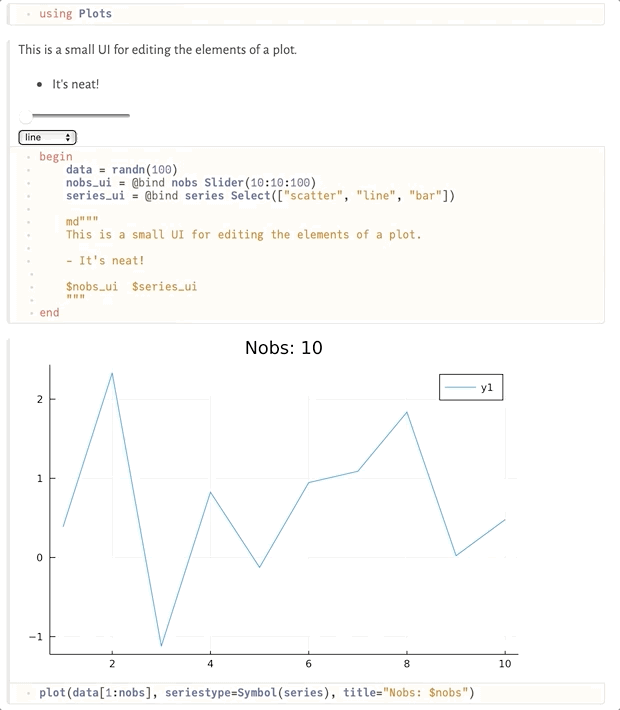
Final Thoughts
On a personal note, I've found Pluto particularly useful for making:
- Lightweight user interfaces for customers without strong Julia skills. I simply teach the customer to run
Pluto.run()and then I don't need to deal with the overhead of developing a full web app. The downside is that Pluto notebooks can't (yet) be deployed as a web app. - Interactive presentations. Pluto works great for demonstrating code and more. A huge benefit is that thanks to reactivity, you'll never get in an awkward state with cells run out of order!
- Data Visualization. Data visualization is often an iterative process that takes many incremental changes to get the plot you want. The reactivity of Pluto provides instant feedback and greatly speeds up this process.
🚀 That's It!
You now know how to do some really cool stuff with Pluto. What will you build with it?
Enjoying Julia For Data Science? Please share us with a friend and follow us on Twitter at @JuliaForDataSci.
Additional Resources
- https://github.com/fonsp/Pluto.jl
- PlutoCon 2021
- Introduction to Computational Thinking - MIT
- Pluto's example notebooks!